Tout sur la culture des champignons en Inde que vous devez savoir
La culture des champignons en Inde se développe progressivement en tant que source alternative de bénéfices pour de nombreuses personnes. À l'échelle mondiale, les Etats Unis, Chine, L'Italie et les Pays-Bas sont les principaux producteurs de champignons. En Inde, L'Uttar Pradesh est le premier producteur de champignons suivi du Tripura et du Kerala.
Qu'est-ce que la culture des champignons ?
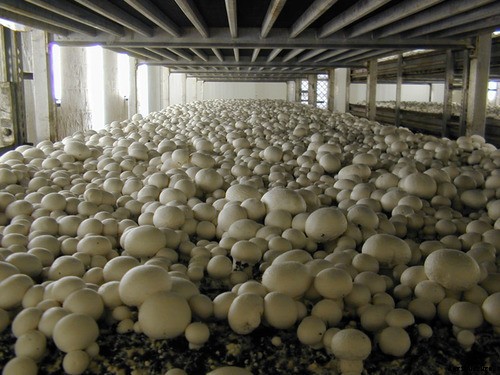
Les champignons sont le cadre de fructification d'un champignon, tout comme les pommes sont les organes de fructification d'un pommier. Un champignon est une sorte de champignon qui porte le nom latin Agaricus bisporus. Les champignons appartenant à des espèces de champignons sont un mets végétarien nutritif et une bonne source de protéines de haute qualité (20 à 35 pour cent du poids sec). Actuellement 3 variétés de champignons sont cultivées à savoir, champignon blanc (Agaricus bisporus), le champignon de la paille de riz (Volvariella volvacea) et le pleurote (Pleurotus Sajor-Caju).
Dans le règne végétal, les champignons sont classés avec les organismes hétérotrophes (plantes inférieures). Contrairement à haut, plantes vertes, ces hétérotrophes ne sont pas capables de photosynthèse. Les champignons sont les charognards de la nature. Dans la culture des champignons, déchets constitués de fumier de poulet, fumier de cheval, paille, le gypse et les eaux usées (provenant de leur propre compost) sont utilisés pour fournir le substrat hautement satisfaisant à partir duquel les champignons pousseront. L'ammoniac est éliminé de l'air de traitement par un laveur d'ammoniac avant d'être restitué à la nature. Même l'ammoniac de l'air est utilisé comme source d'azote dans le compostage.
Le champignon, aussi appelé mycélium, utilise le fumier comme source d'énergie pour sa combustion, libérant l'énergie qui est utilisée pour la croissance. Les champignons contiennent de nombreuses vitamines et minéraux, comme B- Complexe et fer, et sont une bonne source de protéines de qualité comme la lysine. Les champignons sont totalement exempts de matières grasses (cholestérol) et également riches en antioxydants.
Différents types de culture de champignons en Inde :
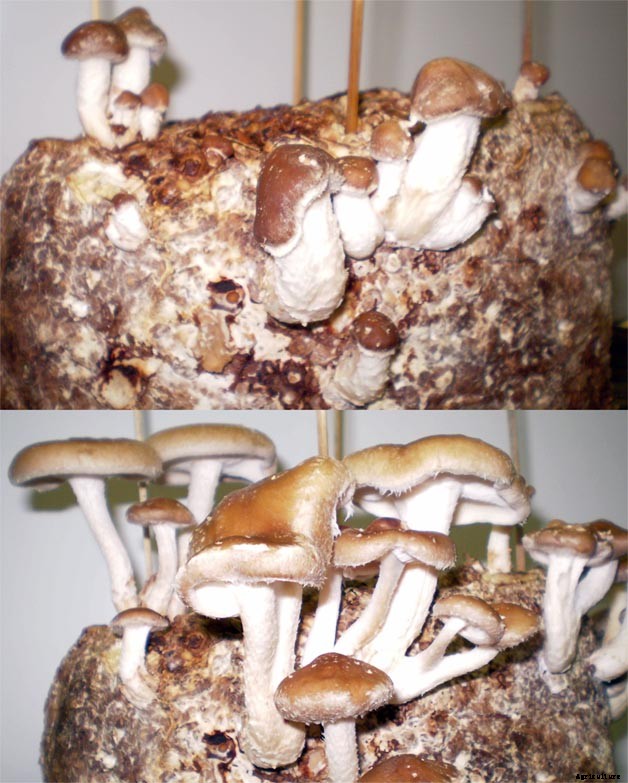
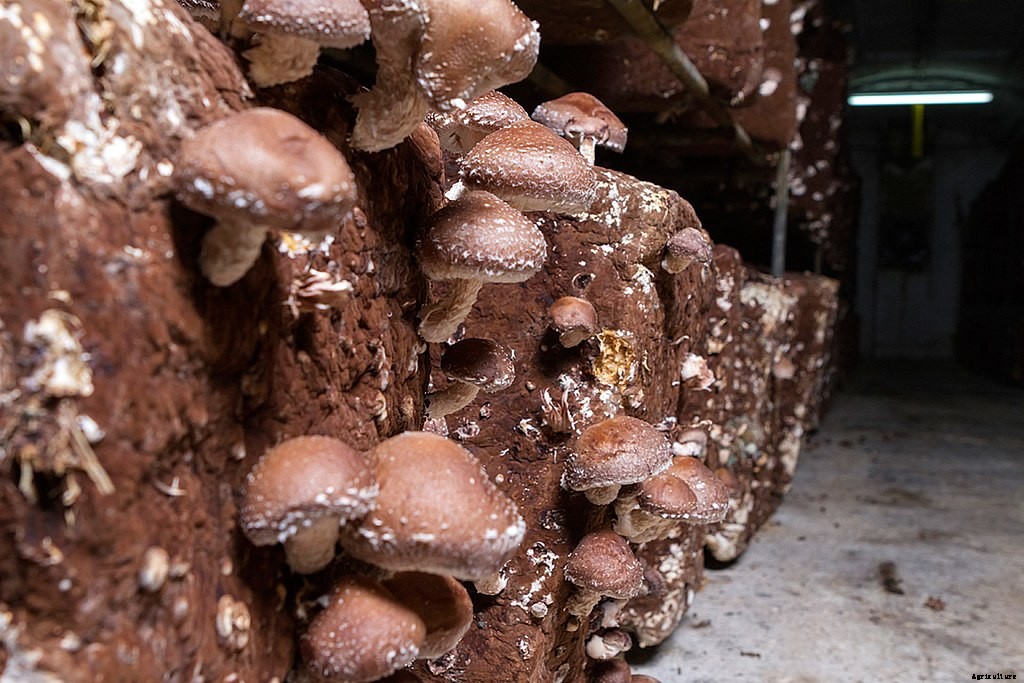
Il existe trois sortes de champignons qui sont cultivés en Inde, ce sont des champignons de Paris, champignon de paille et pleurote. Les champignons de paille de riz peuvent se développer à des températures allant de 35⁰ à 40⁰C. Les champignons de Paris poussent à un moment donné en hiver. Les pleurotes sont cultivés dans les plaines du nord. Les trois champignons d'importance commerciale sont cultivés à l'aide de techniques uniques. Ils sont cultivés sur des lits extraordinaires appelés lits de compost. Apprenez à domestiquer les champignons de chaque type.
Étapes de la culture des champignons :
Voici les six étapes de la culture des champignons :
Étape 1 :Préparation du compost
Pour commencer avec cette fabuleuse idée d'agriculture, nous devons approfondir le concept de « préparation du compost ».
Cette étape initiale de préparation du compost est généralement effectuée à l'extérieur, bien qu'une structure fermée avec une ombre au-dessus puisse être utilisée. Ici une dalle de béton, également connu sous le nom de quai, est nécessaire pour le compostage. Plus, un retourneur de compost pour aérer et irriguer les ingrédients, et un chariot pour déplacer les ingrédients vers le tourneur est nécessaire.
Autrefois, les piles étaient tournées à la main à l'aide de fourches, qui reste une alternative aux outillages et équipements mécaniques, mais c'est assez laborieux et physiquement exigeant pour un travail comme celui-ci.
Tout commence en mélangeant et en humidifiant les ingrédients requis alors qu'ils sont empilés dans une pile de formes rectangulaires avec des côtés serrés et un centre lâche. Normalement, les ingrédients en vrac sont passés dans un retourneur de compost. Après avoir saupoudré cette eau sur le fumier de cheval ou le compost synthétique par exemple, au fur et à mesure que ces matériaux passent devant le tourneur. Maintenant, les suppléments d'azote et le gypse (CaSO4. 2H2O) sont répartis sur le dessus des ingrédients en vrac et sont soigneusement et soigneusement mélangés par le tourneur. Une fois le tas trempé et formé, la fermentation (compostage) commence à la suite de la croissance exponentielle et de la reproduction des micro-organismes, qui est un processus naturel dans les ingrédients en vrac.
Ce Compost pour la culture des champignons se développe au fur et à mesure que la nature chimique des matières premières est transformée par l'activité des micro-organismes, Chauffer, et certaines réactions chimiques exothermiques. Ces éléments se traduisent par une source de nourriture la plus adaptée à la croissance du champignon et inhibent également le développement d'autres champignons et bactéries. Il doit y avoir une humidité optimale, oxygène, azote, et les glucides présents tout au long du processus, autrement, le processus pourrait s'arrêter. C'est pourquoi de l'eau et d'autres additifs sont ajoutés cycliquement et périodiquement, et le tas de compost est agité au fur et à mesure qu'il se déplace dans le retourneur.
Il est intéressant de noter que du gypse est ajouté ici pour minimiser la viscosité que le compost a normalement tendance à avoir. Le gypse augmente la fluidité de certains produits chimiques dans le compost, et ils adhèrent à la paille ou au foin plutôt que d'entraver la porosité entre les pailles. En dehors de cette, l'avantage secondaire de ce phénomène est que l'air peut imprégner le tas confortablement, et l'air est essentiel au processus de compostage. L'exclusion de l'air crée un environnement anaérobie dans lequel se forment des composés chimiques putrides qui sont extrêmement nocifs pour la culture. Le gypse est ajouté au début du compostage à raison d'environ 18 kg par tonne d'ingrédients secs.
Encore un autre supplément important est les suppléments d'azote, qui dans l'usage général aujourd'hui incluent le grain de bière, tourteaux de graines de soja, cacahuètes, ou en coton, et du fumier de poulet, etc. L'ensemble et le seul but de ces compléments sont d'augmenter la teneur en azote à 1,5 % pour le fumier de cheval ou à 1,7 % pour le synthétique, tous deux calculés sur une base de poids sec. Le compost synthétique nécessite l'ajout de nitrate d'ammonium ou d'urée au début du compostage pour fournir à la microflore du compost une forme d'azote facilement disponible pour sa reproduction et sa croissance.
Mais parfois les épis de maïs sont indisponibles ou disponibles à un prix jugé exorbitant. Les substituts des épis de maïs comprennent l'écorce de bois dur déchiquetée ou la sciure de bois, par exemple, coques de graines de coton, marc de raisin neutralisé, coques de fèves de cacao, et marc de raisin neutralisé. La gestion d'un tas de compost contenant l'un de ces matériaux est unique en termes de besoins d'arrosage et d'intervalle entre les retournements du tas.
Au début, le tas de compost doit avoir une largeur de 5 à 6 pieds, 5 à 6 pieds de haut, et long par cela. Une boîte recto-verso peut être utilisée pour former la pile (rick), bien que certains tourneurs soient équipés d'un « ricker », donc une boîte n'est pas nécessaire. Les côtés du tas doivent être fermes et denses, pourtant, le centre doit rester libre tout au long du compostage de la phase I. Comme la paille ou le foin se ramollit pendant le compostage, les matériaux deviennent moins rigides et un rétrécissement peut facilement se produire. Si les matériaux deviennent trop compacts, l'air ne peut pas se cacher autour de la pile et un environnement sans air serait développé.
Ce processus de compostage initial ne dure pas plus de deux semaines, en fonction de la nature du matériau au départ et de ses caractéristiques en chaque point. Il y a une forte odeur d'ammoniac associée au compostage, qui est généralement complété par un bonbon, odeur de moisi. Lorsque les températures du compost sont de 68 degrés centigrades et plus, et de l'ammoniac est présent, des modifications chimiques se produisent qui se traduisent par une alimentation assez exclusivement utilisée par les champignons.
En tant que sous-produit des changements chimiques, la chaleur est libérée et les températures du compost augmentent. Les températures dans le compost peuvent atteindre 76 à 82 degrés Celsius pendant les deuxième et troisième tours lorsqu'un niveau souhaitable d'activités biologiques et chimiques se produit. A la fin de la première phase, le compost doit :1) avoir une couleur brun chocolat; 2) avoir doux, pailles tendres, 3) avoir une teneur en humidité d'environ 68 à 74 pour cent; et 4) ont une forte odeur d'ammoniac. Lorsque l'humidité, Température, Couleur, et l'odeur décrits ont été atteints, toutes nos félicitations! Vous avez maintenant terminé avec l'étape 1.
J'espère que vous avez apprécié la phase I de la culture des champignons !
Étape 2 :Finir le compost
Donc, terminons simplement le processus de compostage.
Maintenant que vous avez terminé avec le compostage de la première phase, we’ll be heading towards the second and extremely important step that is “Finishing the Compost”.
Donc, here are two major reasons for Phase two or step 2 of composting. Pasteurization is necessary to kill any unwanted bacteria, insectes, nématodes, parasites, champignons, or other headaches that may be present in the compost. Et deuxièmement, it is necessary to remove the ammonia which formed during Phase I composting. Ammonia at the end of Step 2 in a concentration higher than 0.07 per cent is often dangerous to mushroom spawn growth, so it must be eliminated; En moyenne, a person can sense ammonia when the concentration reaches the threshold of 0.10 per cent.
Whether the compost is kept in beds, plateaux, or bulk, should be spread uniformly in-depth and compression or density. Compost density should allow for the gas to move around, this would make sure that ammonia and carbon dioxide would be replaced by the outside air.
Step 2 composting can be perceived as a regulated, temperature-dependent, ecological process using air to maintain the compost in a temperature range optimal for the de-ammonifying organisms to grow and reproduce. The growth of these thermophilic (heat-loving) organisms depends on the availability of usable carbohydrates and nitrogen, some of the nitrogen in the form of ammonia.
Optimum management for Phase II is difficult to pinpoint and most growers(commercial) tend toward one of the two systems in common use today:high temperature or low temperature. Due to the jargon nature of this process, it’s quite difficult to put the variables into exact numbers.
Pour ça, you need to consult online, with someone who has experience in this field and it’s better if you find that person in your vicinity.
Step 3:Spawning
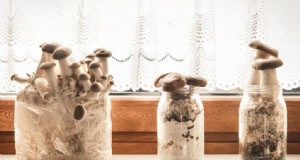
Mushroom spawning is similar to the seedling stage in agriculture and means keeping the spawn (mycelium) of mushrooms that can be purchased from a laboratory at nominal prices. After laying the spawns evenly on the tray and distributing it ergonomically, cover it with a thin layer of compost and keep it moist. Cover the tray with a wet sheet of paper and sprinkle water at regular intervals. The trays can be stacked on top of each other at a spacing of 15–20 cm. Keep the walls and floors wet to maintain a humidity-filled environment and temperature at 25 ° C.
Step 4:Casing
Be a bit vigilant about this one!
The casing is a covering applied to the spawn-run compost on which the mushrooms slowly and steadily form. The constituents are, field soil clay-loam, a mixture of peat moss with ground limestone, or reclaimed weathered, spent compost that could be utilised as the casing.
The Casing doesn’t require nutrients as the casing only acts as a water reservoir and a place where the formation of rhizomorphs takes place. The Rhizomorphs look like thick strings and form when the very fine mycelium fuses.
Casing must be pasteurized to eliminate any insects and pathogens which it might be carrying. It’s also quite important that the uniformity of the layers remains intact. This allows the spawn to move into and through the casing at the same pace and, finalement, mushroom growth happens tauta chromatically. The casing should be able to retain moisture since moisture is essential for the development of a healthy mushroom.
The crop management after casing requires that the compost temperature be kept at around 24° C for up to 5 days after casing, and the relative humidity should be high. Après, the compost temperature should be lowered to about -16.5°C each day until small mushroom initials have formed. Throughout the period following casing, water must be applied periodically to raise the moisture level to field capacity before the mushroom pins form. Knowing when, how, and how much water to apply to casing is an “art form” which is the subtle difference that acts as a trench between experienced growers from beginners.
Step 5:Pinning
The Mushroom instigates as and when rhizomorphs have started growing in the casing. The initials are minuscule but can be seen protruding on a rhizomorph. Once an initial grow four folds in size, the structure is a pin. Pins continue to grow larger through the button stage, and ultimately a button enlarges to a mushroom. The harvestable crop appears after around three weeks or maybe a few days here and there. Pins develop when the carbon dioxide content of room air is lowered to 0.08 per cent or lower, depending on the skill set of the grower, by introducing clean and fresh air into the growing room. Outside air has a CO² content of about 0.04 %.
If the CO² is lowered too early by airing too soon, the mycelium ceases to grow through the casing and mushroom initials plunge to the surface of the casing. As such mushrooms continue to thrive, they push through the casing and are tedious at harvest time. Too little wetness can also result in mushrooms forming below the surface of the casing. Pinning affects both the potential yield and quality of a crop and is a stepping stone in the production cycle.
Step 6:Cropping
It’s the final but a step of utmost importance. The value you’ll be generating out of this business always goes hand in hand with the ingenuity you’re putting in the cropping process.
It varies from person to person and depends upon the given below factors:
Production Capacity
Ambient Conditions
Investissement
Cropping Pattern
These were some of the variables you have to take care of if you want good returns. This comes in naturally as you get more and more experienced in the trade.
Disease and pest controlling measures in Mushroom Farming:
Mushroom flies:
These flies are small, délicat, le noir, yellowish or sometimes brown with different types of wing venation and size.
La gestion:
Spring is inside the wall of the mushroom house.
The insecticide should be added in the last turning of the compost.
Acariens :
They are small in size and are Majorly white, jaune, red and brown.
They can be found running over the surface of the fruit bodies, mushroom beds and on the floors and walls of the mushroom houses.
They damage the crop by feeding on the spawn to make holes in the mushroom caps and stalks and cause stunting of fruit bodies as well as brown spots on the caps and stems.
La gestion:
Proper pasteurization of compost.
Proper hygiene and sanitation.
Disinfection of the mushroom houses by spraying 0.1% dicofol.
Burning sulphur in the empty room.
Springtails:
They are silver-grey 2 brown colours with a light violet band along the sides of the body and black cellular fields present on the head.
They are the main species that damage mushrooms.
They enter mushroom houses along with organic matter.
They feed on mycelium from spawn.
They also feed on the gills of the oyster mushroom destroying the lining and spit out the mycelial strands at the base of the stripes.
They also attack the fruiting bodies of button mushrooms and cause slight pitting and browning at feeding sites.
La gestion:
Cleaning surrounding and inside of the mushroom house.
Proper disposal of spent compost.
Proper pasteurization of composed and casing material.
Raising the crop above the floor level.
Maladies:
Fungal diseases dry bubble:Verticillium fungicola
They are Muddy brown, often sunken spots on the cap of the mushrooms.
Greyish white mouldy
growth was seen on the pileus.
In a later stage, the mushroom
becomes dry and leathery.
La gestion:
Use clean equipment.
Control flies and mites.
Sanitary condition in growth house.
Bubbles can be destroyed with salt.
Infected mushrooms should be destroyed to prevent the spread.
Wet bubble:
Mycogen perniciosa:
Malformed mushrooms with swollen stipes.
Reduced or deformed caps.
Undifferentiated tissue becomes necrotic and a wet, soft rot emits a bad odour.
An amber liquid appears on infected mushrooms.
Mushrooms become brown.
Bubbles may be as large as a grapefruit.
It is also a parasite of wild mushrooms.
It produces two spore types, one which is small and water-dispersed like Verticillium. the second which is a large resting spore capable of persisting for a long time in the environment.
La gestion:
Hygiene and sanitation in a growth house.
Clean surrounding.
Benomyl at the rate of 0.95 g/m².
Carbendazim and Thiabendazole at the rate of 0.62 g/m².
Bacterial diseases:
Bacterial spot / brown blotch:Pseudomonas tolaasii
Pale yellow spots on the surface of the piles later turn yellow.
Dans les cas graves, mushrooms are radially streaked.
Damage at storage and transit.
High humidity and watery conditions are favourable for disease.
Vector:Tyroglyphus mite.
Lesions on tissue that are pale yellow initially later become a golden yellow or rich chocolate brown.
The discolouration is superficial (not more than 2 to 3mm).
La gestion:
Hygiene and sanitation.
Low humidity.
Watering with an A1 50 ppm chlorine solution.
Viral diseases:
Virus (several)
Double-stranded RNA
Reduced cropping,
Bare patches on the beds,
Long-bent stalks with small caps,
Premature opening of mushrooms,
Stalks tapering towards the base of the stalk.
La gestion:
Farm hygiene.
Clean trays to prevent infection from old infected mycelia.
Maintaining 60°C temperature throughout the compost.
Advantages of Mushroom Farming:
Use of ideal structure
Environment friendly
Use agriculture waste as substrate
Possible production all the year-round
Uses less capital
Income and employment generator
Mushrooms are rich in digestible essentials amino acids, rich protein, vitamins and minerals but low volume of high-quality unsaturated fat and water-soluble carbohydrates.
Have high medicinal properties.
It constitutes one of the most promising resources for promoting rapid socio-economic development.
Disadvantages of Mushroom Farming:
Lack of availability of quality spawn.
Mushroom spores can enter your lungs and cause serious health complications.
Mushrooms have an extremely strong smell and it worsens over time.
Need to constantly regulate the temperature.
Lack of proper training.
The chances of contamination are high in the Farming of Mushroom.
Conclusion:
The world mushroom industry has accelerated very rapidly in the last two decades by way of consisting of new types of mushrooms for commercial farming. Cependant, mushroom as a vegetable has not located an ordinary area amongst Indian consumers. Despite a favourable agro-climate, an abundance of agricultural wastes, noticeably low-cost labour and wealthy fungal biodiversity, India has seen a lukewarm response in its growth. Actuellement, the whole mushroom manufacturing industry in India is around 0.13 million tonnes.
From 2010-2017, the mushroom industry in India has recorded a common increase charge of 4.3% per year. Of the total mushrooms produced, white button mushroom bills for 73%, observed through oyster mushroom (16%), paddy straw mushroom (7%) and milky mushroom (3%). Compared to other vegetables; The per capita consumption of mushrooms in India is low and information shows that it is much less than 100 grams per year.
In the 12 months 2016-2017, the Indian mushroom enterprise generated an income of Rs. 7282.26 lakhs by exporting 1054 quintals of white button mushroom in canned and frozen form. Considering the production figures, the demand for spawn in India is estimated to be around 8000-10000 tonnes per year. The majority of this business spawn is furnished to non-public producers and the contribution of public region corporations in spawn grants used to be constrained to only 10%. Dans cet article, we attempted to analyse the contemporary state of affairs of the mushroom industry with the assistance of AICRP community centres placed throughout the US and discuss the possibilities and challenges for the improvement of mushroom entrepreneurship in India.